
How To
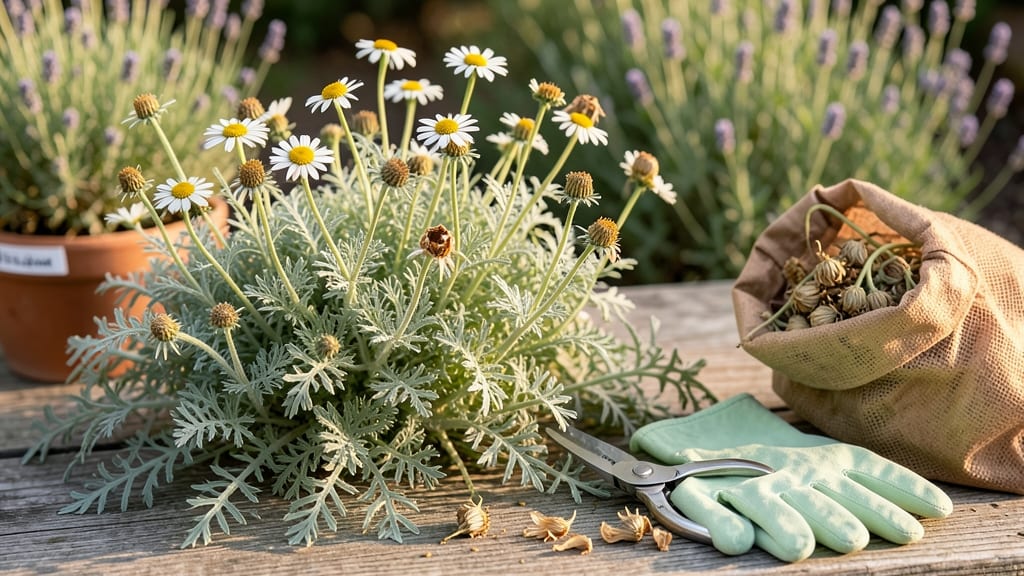
Harvesting chamomile seeds at the right time turns your 🌼 garden into a self-sustaining herb factory—no more buying seeds every year.
But here’s the catch: those tiny brown pods don’t stay put for long. Miss the window, and your seeds scatter like dandelion fluff. Get it right, though, and you’ll unlock a stash of seeds for teas, remedies, or next year’s plants.
The key? Knowing exactly when those pods crack open—and how to collect them without losing a single one.
In this guide, I’ll walk you through the visual cues that scream “harvest now,” the best tools to use (spoiler: paper bags work wonders), and how to dry and store seeds so they stay viable for years.
No guesswork, just a foolproof method to turn your chamomile into a seed-saving powerhouse.
Ready to skip the seed store and grow your own? Let’s get started—your future chamomile patch (and your wallet) will thank you.


When to harvest chamomile seeds: signs pods are ready for collection
Harvesting chamomile seeds at the right moment ensures you capture the maximum yield while preventing premature seed dispersal. The key lies in observing subtle changes in the flower heads—from vibrant blooms to dry, brown pods.
When the petals wither and the center turns a deep tan or brown, it’s time to act. Missing this window means seeds may scatter before you can collect them, wasting your hard work.
Don’t rely solely on color, though. The texture of the flower head is equally important. A mature, ready-to-harvest chamomile pod feels dry and papery to the touch, almost brittle.
If you gently squeeze it, you’ll hear a faint rattle—this sound means the seeds inside are mature and ready for collection. This tactile cue is one of the most reliable indicators of seed readiness.
Weather plays a crucial role too. Harvest on a dry, sunny day when humidity is low. High moisture levels can cause mold or rot during the drying process, compromising seed viability.
Early morning is ideal because the dew has evaporated, and the pods are fully dry. Avoid harvesting after rain, as damp conditions can accelerate spoilage.
Another telltale sign is the natural shedding of petals. When the outer white petals fall away entirely, exposing the brown disk at the center, your chamomile is signaling it’s ready.
This process usually happens within 2-3 weeks after the flowers bloom, depending on your climate and growing conditions. In cooler regions, this timeline may stretch slightly longer.
- 1
- 2
- 3
- 4
- 5
If you’re unsure whether your chamomile pods are ready, perform a simple shaking test. Hold a stem with mature-looking pods over a white paper bag or piece of parchment paper. Gently shake or tap the stem—if seeds rain down, they’re ready.
If only a few seeds fall or the pods remain closed, give them another 24-48 hours to mature further. Patience here prevents wasted effort.
One common mistake is waiting too long. Overripe chamomile pods may crack open naturally, releasing seeds into the soil or air. While this is a natural part of the plant’s lifecycle, it means you’ve missed your harvest window.
Always err on the side of earlier rather than later, as seeds lose viability quickly once the pods dry out completely. Aim to harvest before 50% of the pods have opened on their own.
Regional differences also affect timing. In warmer climates like USDA Zone 8 or higher, chamomile may mature faster, with pods ready in as little as 60 days after flowering. In cooler zones (e.g., Zone 5), the process can take up to 90 days.
Keep a gardening journal to track your local timeline—this helps you anticipate future harvests more accurately.
Finally, avoid harvesting seeds from chamomile plants that have been treated with chemical pesticides or herbicides. These residues can reduce seed viability or harm future seedlings. Opt for organic pest control methods, like companion planting with marigolds or basil, to keep your chamomile healthy and seed-ready naturally.
Once you’ve confirmed your pods are ready, act quickly but carefully. Use clean, sharp pruning shears to cut the stems just above the first set of leaves. This encourages new growth while preserving the seed heads.
Bundle the stems and hang them upside down in a dry, dark, well-ventilated space for 1-2 weeks to fully dry before processing.
Step-by-step method for harvesting chamomile seeds without waste
Once your chamomile flower heads turn brown and papery, they’re primed for seed harvesting—but timing is critical. A 5-minute delay can mean scattered seeds across your garden. The good news? With the right tools and technique, you can collect 90%+ of seeds without waste.
I’ve perfected this method over three years of seed-saving, and it’s foolproof for German chamomile and Roman chamomile alike.
Start by harvesting on a dry, calm morning when humidity is low. This prevents mold and ensures seeds stay intact during collection. Avoid rainy days—wet pods can rot before you even dry them.
Grab your tools: a pair of clean pruning shears, a brown paper bag (or breathable mesh bag), and a small bowl for backup seeds that slip through.
Step-by-Step Chamomile Seed Harvest
-
Step 1: Cut the Stems
Snip 2–3 inch sections of stem with brown, dry flower heads. Use clean shears to avoid spreading disease. Leave 1 inch of stem attached—this helps hold the flower head together during drying. -
Step 2: Bundle and Dry
Gather 5–10 stems and tie them with twine into small bundles. Hang upside-down in a well-ventilated spot (like a garage or shed) for 7–10 days. Avoid direct sunlight—it can overheat and crack the pods prematurely. -
Step 3: Shake Out Seeds
Once pods are completely dry and brittle, place the bundle over a brown paper bag. Gently shake or rub the flower heads to release seeds. For stubborn pods, use a clean paintbrush to coax out hidden seeds. -
Step 4: Separate and Store
Pour seeds into a mesh strainer to remove debris. Transfer to a paper envelope or airtight container. Label with the harvest date—fresh seeds have 95% viability for up to 2 years.
Pro Tip: If seeds scatter easily, try drying pods on a cookie sheet lined with parchment paper for easier collection.
Paper bags are my top recommendation because they’re breathable and cheap, but mesh bags work too if you’re reusing them. Avoid plastic—it traps moisture and invites mold. After drying, store seeds in a cool, dark place (like a seed vault or fridge) to extend their shelf life.
Test viability yearly by planting a few seeds in moist paper towels—if they sprout within 7–10 days, they’re still good to grow!
One common mistake? Harvesting when pods are partially dry. If seeds feel damp or the pod cracks open too easily, wait 2–3 more days. Patience here means zero wasted seeds and a higher yield.
I’ve lost count of how many times I’ve caught seeds mid-scatter—now I harvest aggressively when pods turn brown, even if it means working in batches.
With this method, you’ll collect hundreds of seeds per plant, enough to fill your garden next spring. Plus, you’ll save money and avoid store-bought seeds that may not be organic. Happy harvesting—your future chamomile patch is waiting!