
How To
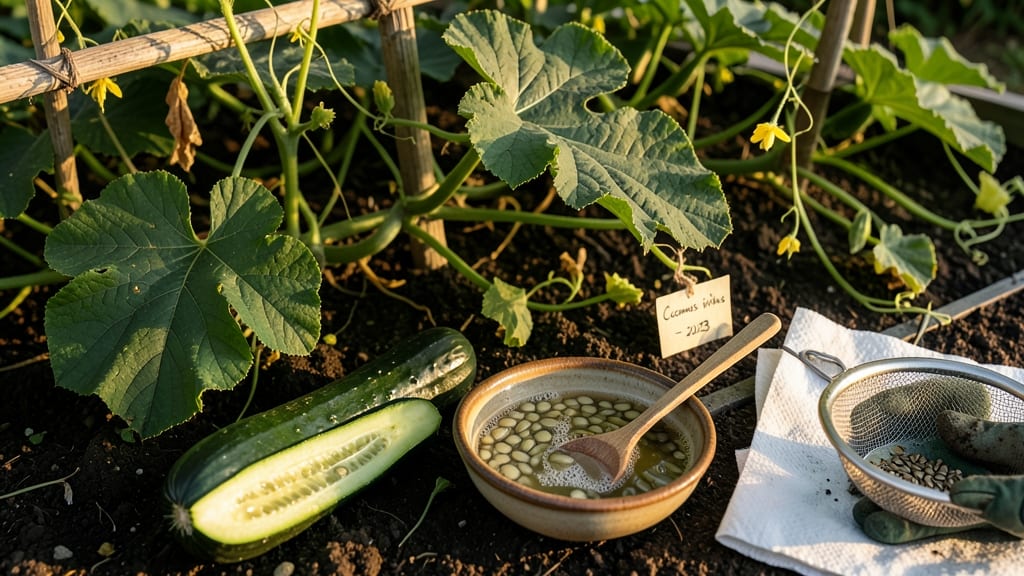
To harvest cucumber seeds from mature fruit, you’ll need to wait for the 🥒 cucumbers to overripen on the vine—this is the key to viable seeds that grow true to type.
Struggling to preserve heirloom cucumbers or rare varieties? Harvesting your own seeds is the secret to growing the exact plants you love year after year—without buying new ones every season.
If you’ve ever sliced into a store-bought cucumber only to find bland, watery seeds, you know why saving your own matters.
This simple process turns your garden’s best performers into next year’s star plants. Whether you’re saving space, cutting costs, or keeping a family heirloom alive, knowing how to harvest cucumber seeds correctly ensures you’ll have healthy, fertile seeds ready for planting in spring.
Below, I’ll walk you through every step—from selecting the right cucumbers to drying, storing, and even testing your seeds for germination. No fancy tools or complicated science required, just a little patience and the right timing.
Step-by-step guide to harvesting cucumber seeds from overripe fruit
Saving cucumber seeds from overripe fruit is one of the easiest ways to preserve heirloom varieties year after year. Whether you're growing burpless cucumbers, long green varieties, or colorful heirlooms, this process ensures you'll have fresh seeds ready for next season's garden.
The key lies in selecting the right cucumbers and following precise drying techniques to maintain seed viability.
Not all cucumbers are suitable for seed harvesting. Look for fully ripe cucumbers that have turned yellow or brown on the stem end—a clear sign they're past their prime for eating but perfect for seed saving.
These overripe cucumbers contain mature seeds that are ready for extraction. Avoid harvesting seeds from cucumbers treated with commercial fungicides or pesticides, as these can harm seed germination.
Once you've selected your seed-saving cucumbers, the next step is to extract the seeds properly. This involves fermenting the fruit to separate the seeds from the gelatinous pulp, which helps remove any remaining fruit tissue.
The fermentation process also reduces the risk of mold contamination, ensuring your seeds stay healthy. Let’s break down the process step by step to guarantee success.
- 1 Select the right cucumbers: Choose overripe cucumbers that are fully colored and have turned yellow or brown at the stem end. These indicate the seeds are mature and ready for harvest.
- 2 Slice and scoop: Cut the cucumber open lengthwise and scoop out the seeds and pulp into a clean bowl. Avoid using metal utensils to prevent contamination.
- 3 Ferment the mixture: Cover the bowl with a clean cloth or paper towel and let it ferment in a warm spot for 2-3 days. This breaks down the pulp and allows seeds to separate.
- 4 Rinse the seeds: After fermentation, rinse the seeds under cool water to remove any remaining pulp. Use a fine-mesh strainer to catch the seeds while allowing water to drain.
- 5 Dry the seeds: Spread the seeds on a paper towel or screen in a well-ventilated area for 3-5 days. Ensure they are completely dry to prevent mold.
- 6 Store the seeds: Once dry, store the seeds in a paper envelope or airtight container in a cool, dark place. Label each container with the cucumber variety and harvest year for easy identification.
Proper drying is critical to maintaining seed viability. After rinsing, spread the seeds on a paper towel or mesh screen in a shady, well-ventilated area. Avoid direct sunlight, which can overheat the seeds and reduce their germination rate.
Aim for a drying time of 3-5 days, stirring them occasionally to ensure even drying. You’ll know they’re ready when the seeds are hard and no longer sticky.
Once your seeds are fully dry, store them in paper envelopes or airtight containers. Label each container with the cucumber variety and the harvest year to avoid confusion, especially if you’re saving multiple types.
Store the containers in a cool, dark place, such as a pantry or seed storage box. Properly stored seeds can remain viable for 3-5 years, though germination rates may decrease over time.
To ensure your seeds are still viable before planting, conduct a simple germination test. Place a few seeds between a damp paper towel and let them sit in a warm spot for 5-7 days.
If most of the seeds sprout, they’re ready for planting. This step saves you from planting seeds that may not grow, ensuring a successful harvest next season.
Harvesting cucumber seeds is a rewarding process that connects you to the cycle of plant propagation. By following these steps, you’ll not only preserve your favorite heirloom varieties but also reduce waste by repurposing overripe cucumbers. Plus, the satisfaction of growing plants from seeds you saved yourself is unmatched!
Experiment with different cucumber varieties to see which ones produce the most viable seeds. Some varieties may require slightly different drying times or storage conditions, so keep notes on what works best for your garden. Happy seed saving!
How to test and store cucumber seeds for next season’s planting
Once you’ve harvested your cucumber seeds, the next critical steps are testing viability and proper storage. Even the best seeds lose potency if stored incorrectly—humidity, temperature, and light exposure all play vital roles in keeping seeds alive for planting.
With the right methods, your cucumber seeds can stay viable for 3-5 years, ensuring you’ll have fresh stock every spring.
Before storing, it’s smart to test a small batch for germination rates. This simple process takes just 7-10 days and saves you from planting dozens of non-viable seeds.
I’ll walk you through both the paper towel method and long-term container storage techniques, plus how to organize seeds so you never mix up varieties again.
Comparison Table: Seed Testing vs. Storage Methods
| Method | Time Required | Best For | Materials Needed |
|---|---|---|---|
| Paper Towel Test | 7-10 days | Quick viability check | Paper towels, plastic bag, water spray |
| Seed Envelope Storage | 10-15 mins setup | Long-term seed preservation | Envelopes, silica gel packets, airtight container |
| Glass Jar Storage | 5 mins setup | Small batches, easy access | Glass jar, coffee canister, labels |
| Vacuum Sealing | 5-10 mins | Max longevity (5+ years) | Vacuum sealer, oxygen absorber |
For the paper towel test, place a few dried seeds between damp paper towels in a sealed plastic bag. Store them in a warm, dark place (like a pantry) and check for sprouts in 3-7 days.
If 80% or more sprout, your seeds are ready for storage. If fewer than 50% sprout, consider harvesting more cucumbers next season or storing fewer seeds.
When storing seeds long-term, humidity control is key. Use silica gel packets or uncooked rice in containers to absorb excess moisture. Store seeds in a cool, dark place—a refrigerator or root cellar works best.
Label each container with the variety name, harvest year, and germination date to avoid confusion. I like using mason jars with small paper labels taped to the lid.
Organizing seeds by variety is a game-changer, especially if you grow multiple cucumber types. Use a spreadsheet or seed catalog notebook to track traits like color, size, and disease resistance.
For example, note whether your ‘Straight Eight’ cucumbers produced longer fruits or if your ‘Lemon’ variety had better heat tolerance. This helps you replicate successes in future gardens.
With these methods, your cucumber seeds will stay fresh and ready for planting—no more last-minute store trips or settling for bland hybrids. Happy seed-saving! 🌱