
How To
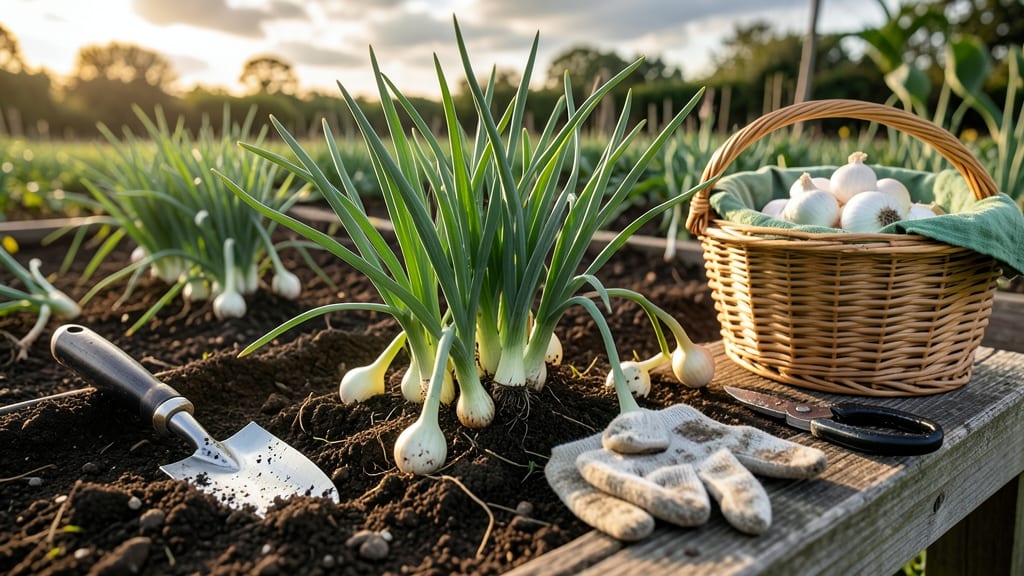
Harvesting shallots at the right time means the difference between tender, flavorful bulbs and tough, pungent ones — and the key is watching for those yellowing tops and firm 1-2-inch bulbs.
Picture this: you’ve nurtured your 🧅 shallots all spring and summer, and now the tops are browning while the soil stays warm. That’s your cue — but wait too long, and you’ll dig up split, woody bulbs that taste like disappointment.
Timing is everything, and missing it can ruin months of work.
Most gardeners in USDA Zone 6a should harvest between late September and early October, when the tops yellow and dry out. But regional weather plays a role: cooler summers might delay harvest, while early frosts can force an earlier dig.
Below, I’ll break down the exact signs to watch for, plus how to store your harvest so it lasts all winter.
You’ll also discover how bulb size, leaf color, and even the weather forecast can help you nail the perfect harvest window — because the right timing isn’t just about when, but how you prepare for it.


How to identify the perfect harvest time for shallots by leaf color and bulb size
Harvesting shallots at the right time ensures you enjoy their mild, sweet flavor and tender texture. Unlike onions, shallots develop best when their leaf color changes and bulbs reach maturity.
Timing is everything—wait too long, and you risk split bulbs or bitter taste. Here’s how to spot the perfect moment.
First, watch for the leaf color shift from deep green to straw-colored or yellow. This change signals the plant is redirecting energy from foliage to bulb growth. The outer leaves will start drying out while the inner leaves remain green.
This transition usually occurs in late summer to early fall, but exact timing depends on your climate zone.
Next, check the bulb size—your shallots are ready when they’re 1 to 2 inches in diameter. Gently dig up one bulb to inspect: if it’s firm, dry, and papery-skinned, it’s harvest-ready.
If the bulb is still soft or under 1 inch, wait a few more weeks. Over-mature bulbs split easily and lose flavor.
Regional climates play a big role. In cooler zones (USDA 3-5), harvest shallots in late summer (August-September) before the first frost. In warmer zones (USDA 7-10), you can extend harvesting into early fall (October-November) or even spring of the next year for a second crop.
Adjust based on your last frost date.
Don’t ignore the neighboring bulbs—if they’re pushing apart in the soil, it’s time to harvest. Crowding stresses the plants and can lead to smaller, uneven bulbs. Use a garden fork to gently loosen the soil around the base before pulling them up.
Avoid cutting the tops too short; leave 1-2 inches of stem to help with curing.
Here’s a quick reference to help you decide:
| Sign | What to Look For | Action |
|---|---|---|
| Leaf Color | 50-70% yellow/brown, outer leaves dry | Harvest in 1-2 weeks |
| Bulb Size | 1-2 inches in diameter, firm | Ready to harvest now |
| Skin Texture | Dry, papery, no moisture | Perfect harvest time |
| Neighboring Bulbs | Pushing apart in soil | Harvest immediately |
| Seasonal Cue | Late summer/early fall (or spring in warm zones) | Align with local frost dates |
If you harvest too early, your shallots will be small and underdeveloped, lacking the rich flavor they’re known for. On the flip side, waiting too long results in split bulbs or wooden texture.
Pro tip: harvest on a dry, sunny day to speed up curing. Lay the shallots in a single layer in a well-ventilated area for 1-2 weeks to dry completely before storing.
For gardeners in cooler climates, consider harvesting a portion of your crop before the first frost. Shallots can be stored in a cool, dark place (like a root cellar) for up to 6 months, extending your harvest well into winter.
If you miss the window, don’t worry—shallots are perennial in mild climates and may produce a smaller crop the following spring.
Pay attention to your local weather patterns—unexpected rain or heatwaves can accelerate or delay maturity. For example, a hot summer might push harvest time earlier, while a cool, wet season could extend it. Keep a garden journal to track when your shallots reach peak harvest time each year.
Finally, remember that variety matters. Some shallots, like 'Red Danube', mature faster than others. Always check the seed packet or plant tag for specific harvest guidelines. With these visual cues and seasonal adjustments, you’ll never miss the perfect moment to harvest shallots again.
Step-by-step shallot harvesting process to avoid common mistakes
Once your 🧅 shallots show those telltale signs of readiness—yellowing tops and firm 1-2-inch bulbs—it’s time to act fast. Delaying just a few days can turn your harvest into split, woody bulbs that lose flavor and storage potential.
The key is a gentle, precise approach that preserves bulb quality while avoiding damage. I’ll walk you through every step, from digging to storage, so you end up with plump, flavorful shallots ready for your kitchen.
Start by gathering your tools: a garden fork (to avoid piercing bulbs), pruning shears, gardening gloves, and a basket or tray for handling. Work on a dry, sunny day to speed up curing—this is critical for preventing rot.
If rain is forecasted within 24 hours, harvest early to avoid soggy bulbs. The goal? To minimize stress on the plants while maximizing bulb integrity.
✅ Step-by-Step Shallot Harvesting Guide
- Step 1: Loosen the Soil - Use your garden fork to gently lift soil around the shallot clumps, working in a circular motion. Aim for 2-3 inches deep to avoid damaging bulbs.
- Step 2: Lift the Bulbs - Grasp the base of the foliage and pull upward to remove the entire clump. Shake off excess soil, but don’t rinse—moisture speeds up spoilage.
- Step 3: Trim the Tops - Use pruning shears to cut foliage back to 1-2 inches above the bulbs. This reduces water loss during curing.
- Step 4: Cure the Harvest - Lay shallots in a single layer on a screen or mesh tray in a shady, dry spot (like a garage or porch). Cure for 1-2 weeks until skins turn papery and dry.
- Step 5: Store Properly - Once cured, brush off loose soil and store in a cool, dark place (like a mesh bag or cardboard box) with good airflow. Avoid plastic bags to prevent rot.
Watch for over-maturity signs like split bulbs or excessive dryness—these indicate you waited too long. If you see yellowing leaves but bulbs are still small (under 1 inch), they’re not ready.
Harvesting too early risks underdeveloped flavor, while waiting too long ruins texture. Aim for that golden middle where bulbs are firm, dry-skinned, and 1-2 inches wide.
After curing, store shallots in a cool (40-50°F), dark place with 50-60% humidity. A ventilated basket works best—never refrigerate until you’re ready to use them, as cold temperatures convert starches to sugars, altering taste.
With proper care, your harvest should last 2-3 months, giving you fresh shallots for winter cooking and early spring planting.
Pro tip: If your region has early frosts (like mine in Zone 6a), harvest 2 weeks before the first frost date. Shallots are hardy to 20°F, but bulbs won’t mature properly in cold soil.
For overwintering, leave a few bulbs in the ground—they’ll regrow in spring, giving you an early harvest the following year.
Remember, the right timing and gentle handling are everything. Follow these steps, and you’ll enjoy plump, flavorful shallots all season long—no tough, split bulbs in sight! 🌱