How To
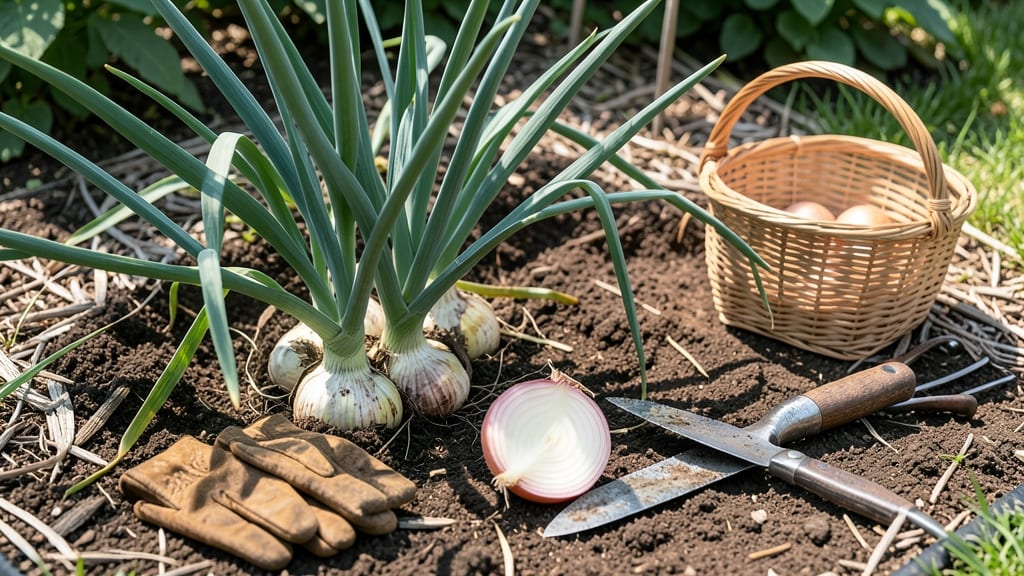
To harvest onions at their peak—when bulbs are plump, flavorful, and free of bitterness—you need to watch for the right cues, not just the calendar.
Knowing the exact moment to harvest onions can mean the difference between sweet, flavorful bulbs and bitter, pungent leftovers—yet most gardeners miss the window entirely. The key? Paying attention to leaf color, bulb size, and even the soil beneath those 🧅 tops.
Onions planted in spring (like in USDA Zone 6a) typically reach harvest between July and August, but timing varies by variety. Short-day onions mature faster, while long-day types need more time. The worst mistake? Waiting until the tops are crispy—by then, the bulbs may already be hollow.
In this guide, I’ll walk you through the visual and soil tests that tell you exactly when to pull them, how to store your harvest, and what to do if you’ve missed the boat. No more guesswork—just perfect onions, every time.


Signs your onions are ready for harvest: bulb size & leaf color guide
Harvesting onions at the right time ensures flavorful bulbs that store well, but many gardeners struggle to spot the perfect moment. The key lies in watching for visual maturity cues—especially leaf color and bulb size—which vary by onion type.
Unlike green onions, storage onions need fully developed bulbs, while day-neutral varieties mature differently based on sunlight exposure.
For storage onions, aim for bulbs 2-3 inches wide with dry, papery outer layers. Meanwhile, green onions (scallions) are ready when their leaves reach 6-8 inches tall and the white base thickens slightly.
Day-neutral onions, like shallots, may take longer since they don’t rely on daylight length for maturity.
Here’s how to distinguish readiness across onion types using leaf color, stem flattening, and bulb firmness—plus a quick reference table to simplify your harvest decisions.
| Onion Type | Leaf Color | Bulb Size | Stem Condition | Harvest Time |
|---|---|---|---|---|
| Storage Onions | Yellow/brown, dry, flopping | 2–3 inches wide | Flattened, papery skin | Late summer (120–150 days) |
| Green Onions | Green, upright (no browning) | 0.5–1 inch white base | Tender, no flattening | 45–60 days (cut-and-come-again) |
| Day-Neutral (e.g., Shallots) | Yellowing, dry tops | 1.5–2.5 inches wide | Neck shrinks, skin tightens | 90–120 days (varies by variety) |
Harvest storage onions on dry days to prevent rot; green onions can be harvested multiple times.
Pay close attention to the top leaves—when they turn yellow-brown and flop over, it’s a classic sign that the bulb below has reached maturity.
For storage onions, this usually happens in late summer, while green onions can be harvested every 2–3 weeks by snipping just above the soil line.
Bulb size is another critical clue: Storage onions should be 2–3 inches wide with a firm, round shape. If you dig up a bulb and it’s soft or irregular, it’s not ready—leave it in the ground for another 1–2 weeks.
Over-mature onions develop hollow centers, making them bitter and unsuitable for storage.
Day-neutral varieties, like shallots, often mature earlier than storage onions because they don’t rely on daylight changes. Check for a shrinking neck (the stem above the bulb) and dry, papery skin—these are your green lights to harvest. If the neck hasn’t shrunk, wait another 7–10 days.
For green onions, the rules are simpler: harvest when the white base reaches 0.5–1 inch thick and the green leaves are 6–8 inches tall. Unlike storage onions, you can cut-and-come-again by snipping the tops and letting the base regrow.
This method works best in spring and fall when temperatures are mild.
Pro tip: If you’re unsure, perform a soil dig test—gently uncover a bulb to check its size and firmness. This method works for all onion types and eliminates guesswork. Just be sure to recover the soil and water lightly afterward to avoid stressing the plant.
Avoid harvesting in wet weather, as moisture can cause bulbs to rot. Instead, choose a dry, sunny morning for the best results. Once harvested, cure storage onions in a dry, shaded area for 2–3 weeks to toughen their skins and improve storage life.
🌱
The soil dig test: how to check onion maturity without guessing
When your onion tops start yellowing and flopping, it's time to dig deeper—literally! The soil dig test is my foolproof method to check bulb maturity without guessing. Unlike surface signs that can be misleading, this test reveals what's happening underground.
I've used it for years to harvest onions at their peak for both fresh use and long-term storage, and it's saved me from bitter, over-mature bulbs.
Most gardeners wait until the tops are completely brown and dry, but by then, some onions may already be over-mature with hollow centers. The dig test lets you harvest at the perfect moment—when bulbs are fully developed but still firm.
This method works for all onion types, including storage onions, green onions, and day-neutral varieties. I'll show you exactly how to perform it in just a few simple steps.
Once you've confirmed maturity, harvest your onions by cutting the tops about an inch above the bulb. Leave the bulbs in the sun for 1-2 hours to dry the skins before storing.
For long-term storage, cure them in a dry, well-ventilated area for 2-3 weeks. I always store mine in mesh bags to prevent rot and check them monthly for spoilage.
If your onions are over-mature, don't toss them! Use them fresh in soups, stews, or caramelized dishes. The flavor will be stronger, but the texture may be softer. For next year, adjust your harvest timing by digging a test bulb a week earlier to catch the perfect window.
Pro tip: Mark your onion rows with flags when you plant them. This makes it easier to track growth stages and perform the dig test without disturbing nearby plants. A little planning now saves you from guesswork later! 🧅